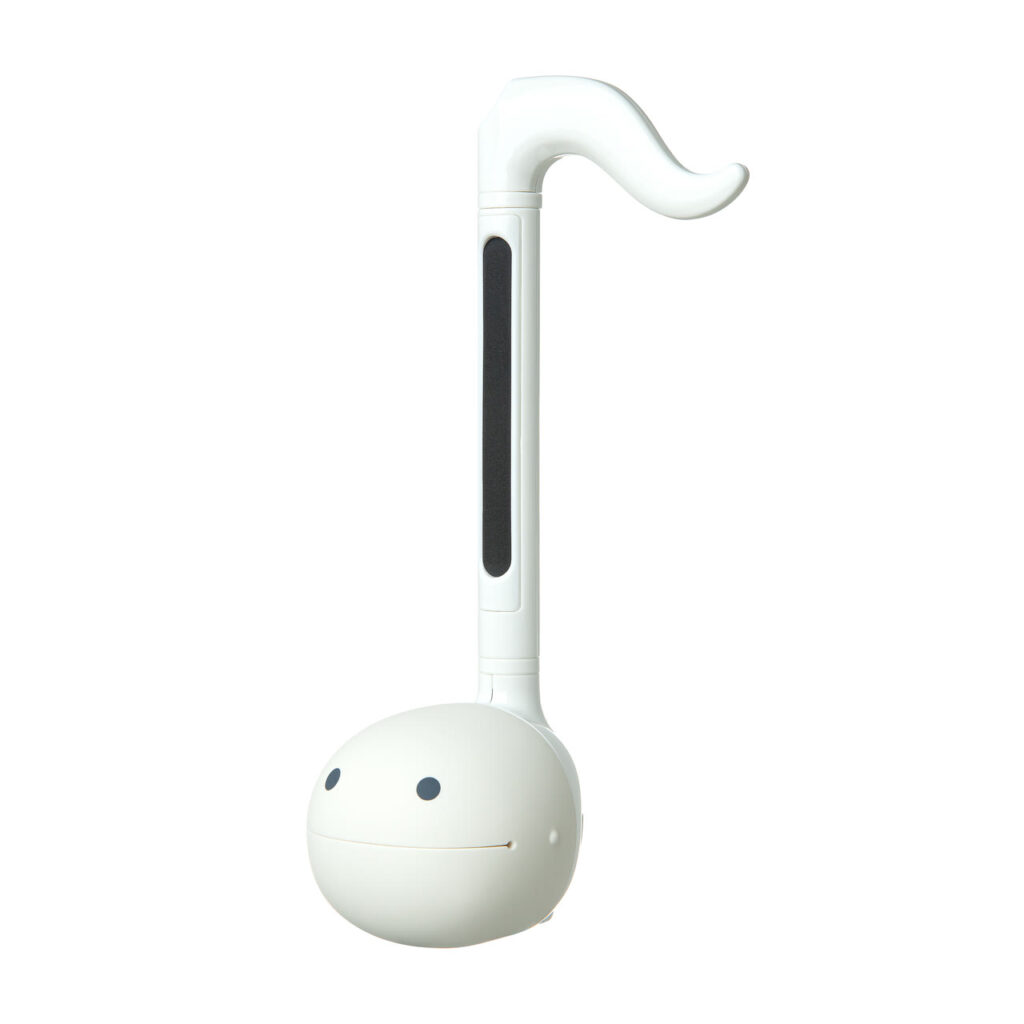
White

Black
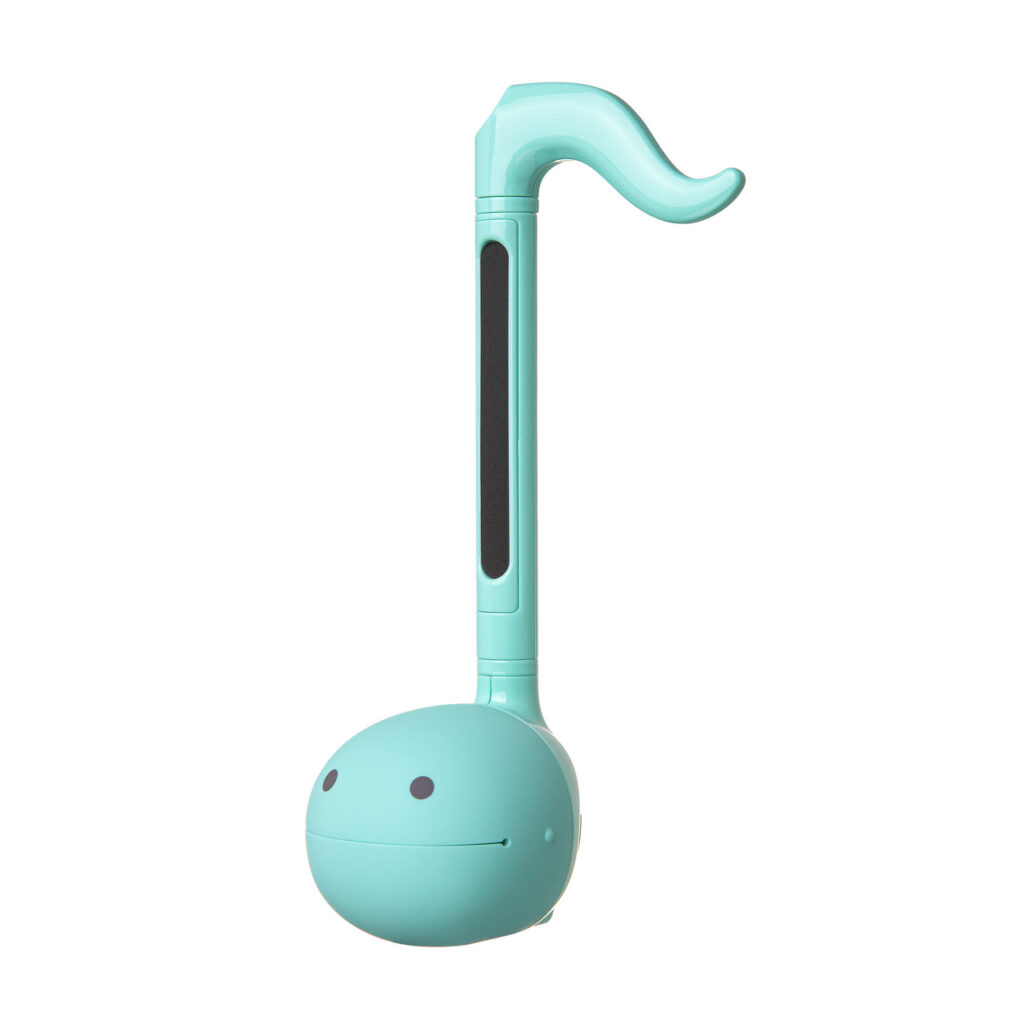
Mint
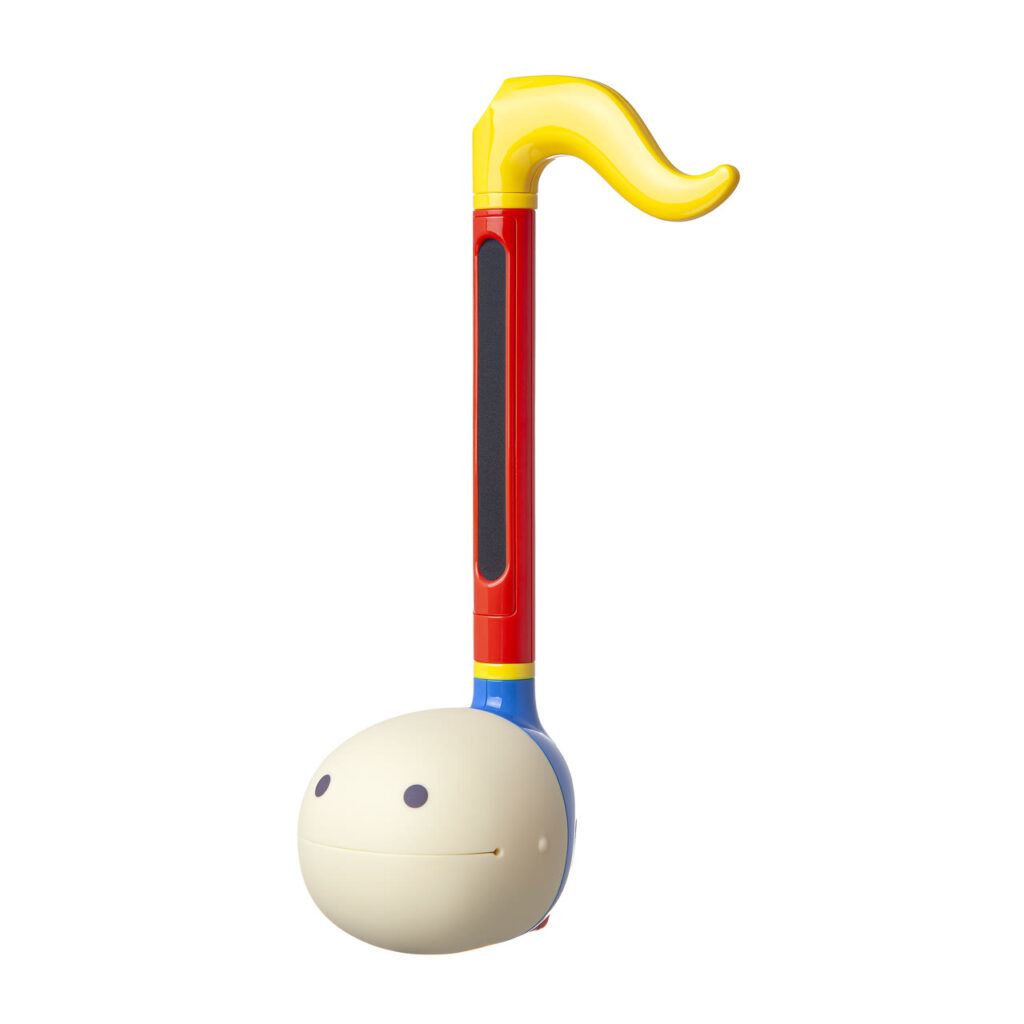
Pop
Pastel
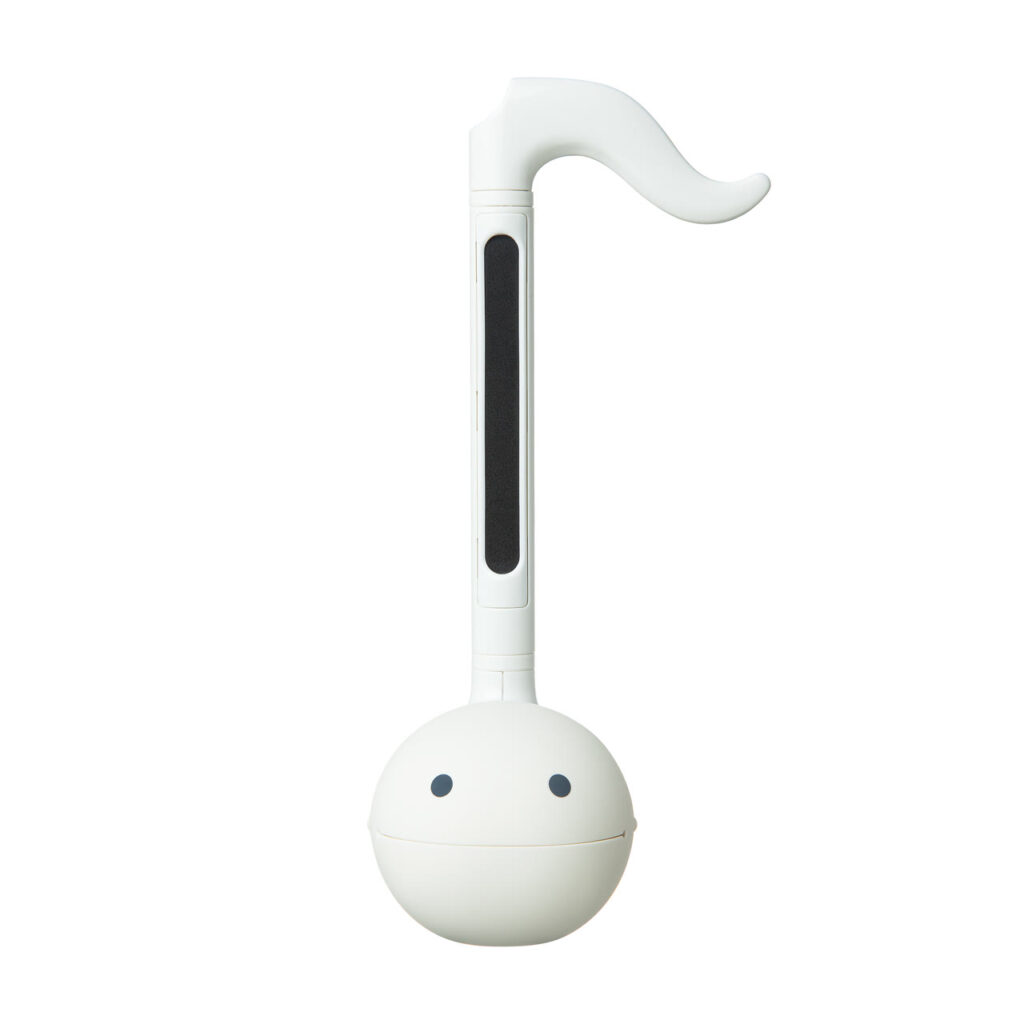
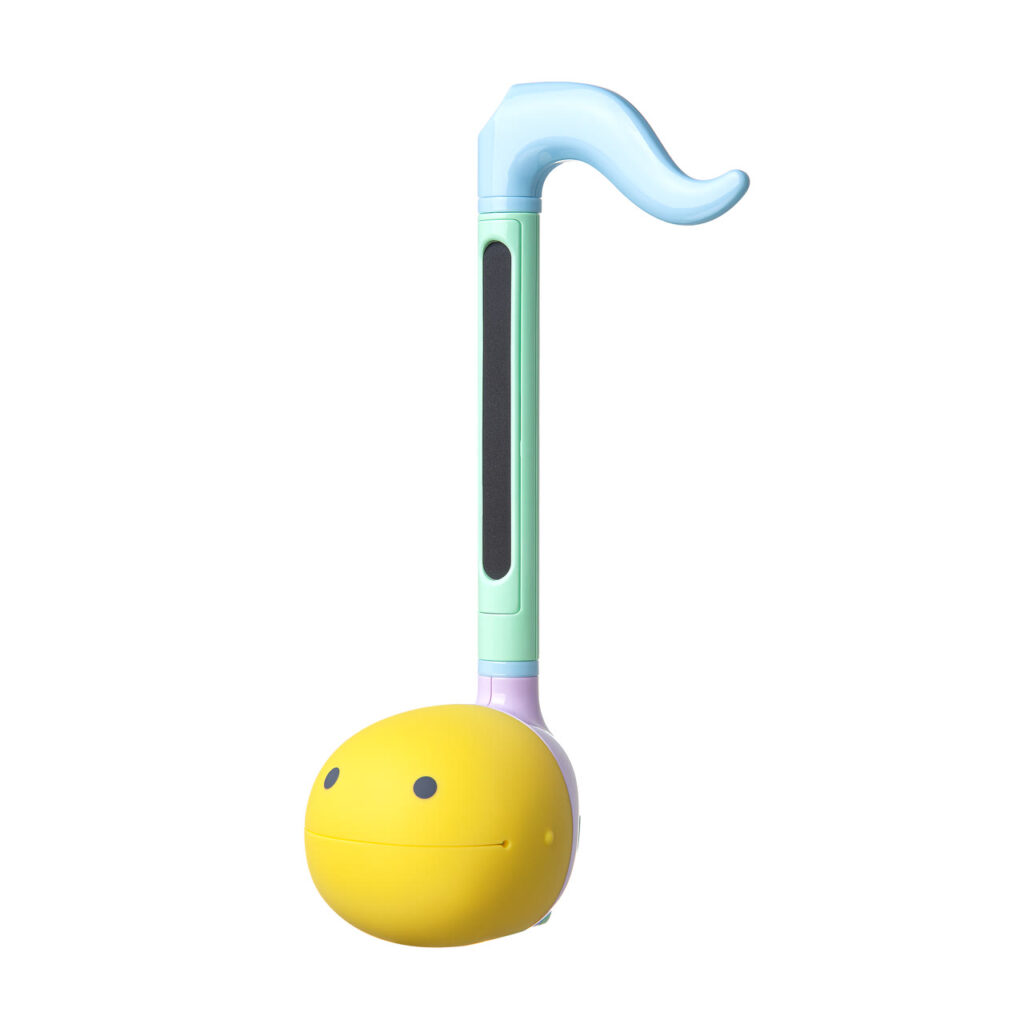
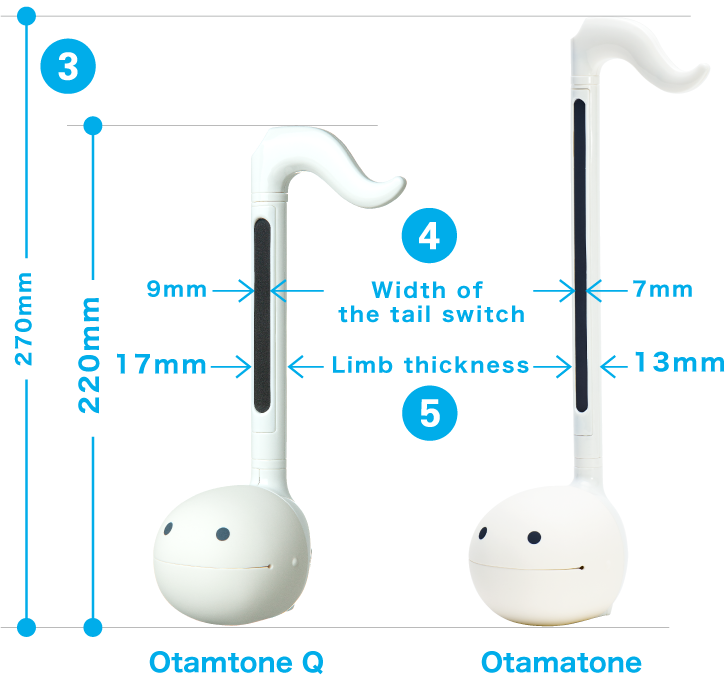
Otamatone Q
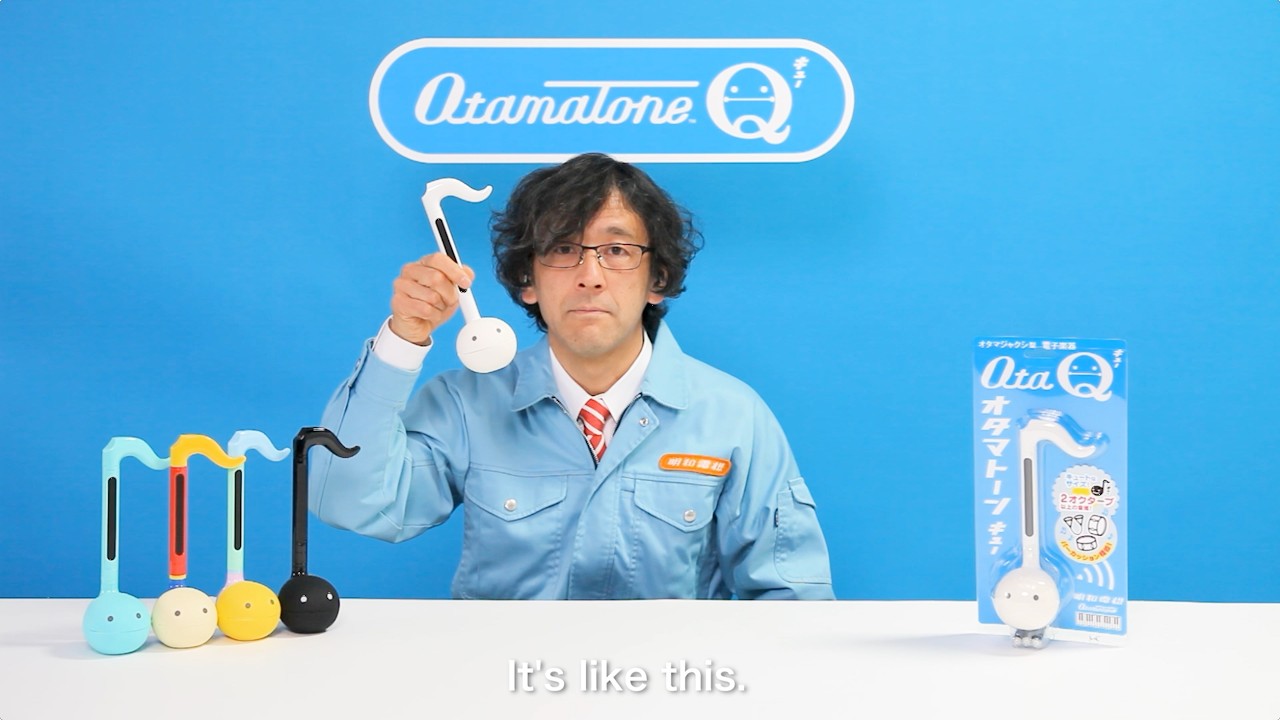
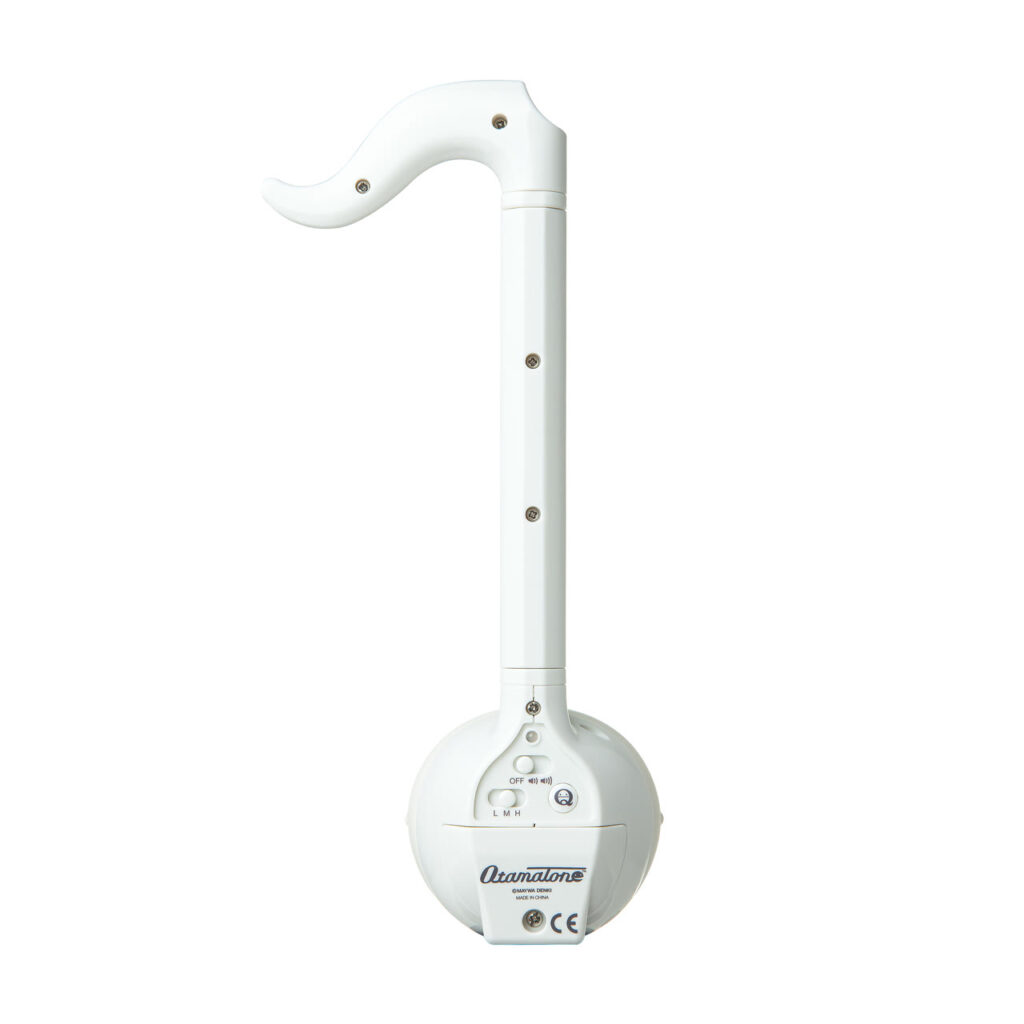
Scheduled for release in mid-JunePerfect for first-time Otamatone users. A cute new model is now available. The tail switch is wider than on the standard-sized Otamatone, making it easier to play. It’s also smaller and easier to carry around. With a range of over two octaves, you can play actual songs. The body has been designed with rounded edges for a comfortable grip. It also features a power indicator light to prevent forgetting to turn off the battery. Pressing the “Q button” activates the new “Percussion Mode,” letting you play with fun rhythms. You can even divide parts and enjoy playing together as a group.
- Standard
- Q
- Pro
- + Smartphone
- Easy
- Apps
- Digital
- Analog
- Plush toy
- Lifestyle
- Accessory
- COLOR
-
White
-
Black
-
Mint
-
Pop
-
Pastel
| Released | 2026/6 |
|---|---|
| Price | 6,050Yen (with tax) |
| Size | W69 × H220 × D75mm |
| Powered by | 3 AAA batteries (alkaline batteries recommended) |
| Includes | Practice sheet (Froggy's Song) / Test batteries |

OTAMATONE Q DETAILS
This model is perfect for first-time Otamatone users.
The tail switch is larger, making it easier to play,
and the new “Percussion Mode” lets you play rhythms.
Upgrades from the standard Otamatone
-
A power LED reminds you of battery shortage.
-
Press the “Q” button to enter Percussion Mode and play with rhythms.
-
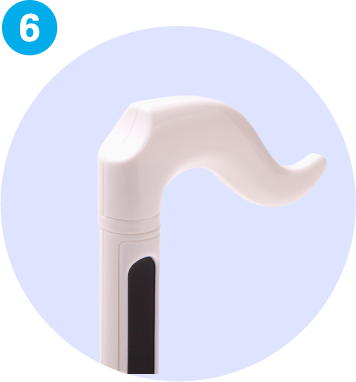
It’s a bit smaller, making it easy to carry around. Even though it’s smaller, it still has a range of over two octaves.
-
The stem switch is wider for improved playability.
-
The instrument is thicker and feels more solid when performing.
-
The edges of the entire body have been rounded off, making it more comfortable to hold.
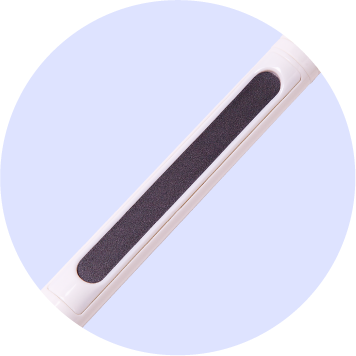
Percussion Mode
-
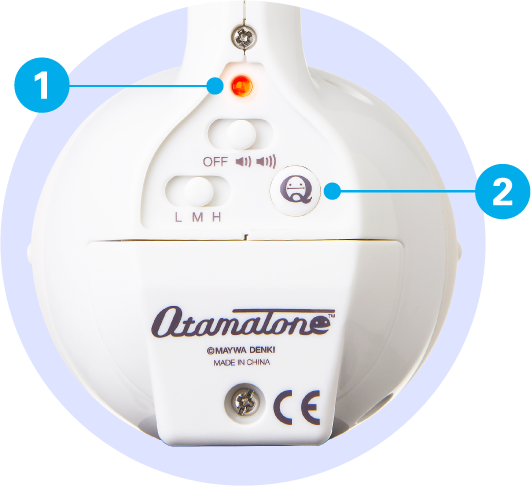
Pressing the Q button activates percussion mode, and the power lamp turns blue.
Each time you press it, the device switches between percussion mode and normal mode.
-
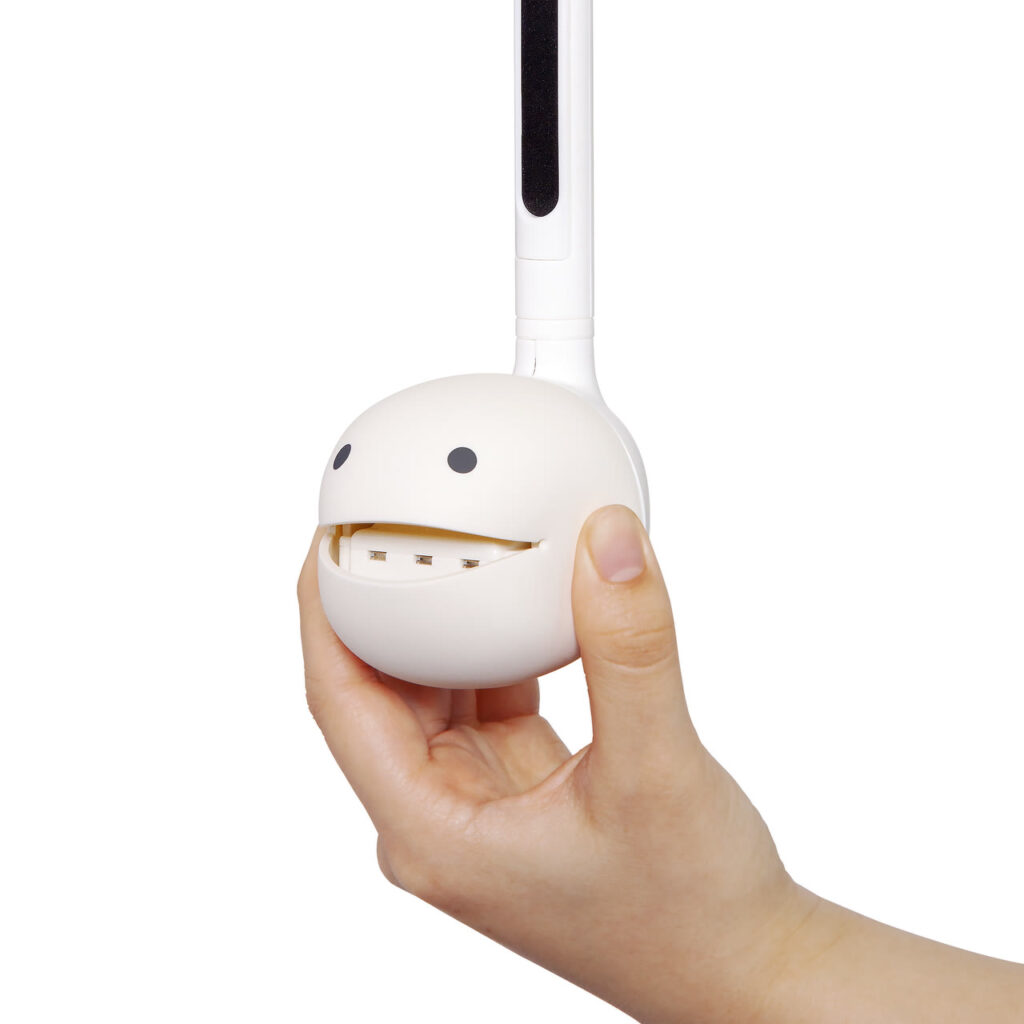
The tail switch is divided into three sections, and pressing each area produces a percussion sound, allowing you to play it like a percussion instrument.
Caution
This is not a defect or malfunction.
This is a characteristic of the Otamatone Q's analog circuitry. Please be aware of this.
-
・Differences in the width of the three sections
Due to the nature of switch plates, there may be slight variations in size from product to product, and they are not all the same width. -
・Symptoms when tapping rapidly
Due to the switch's detection specifications, if you rapidly alternate between pressing different buttons, no sound will be produced. In that case, try pressing the buttons a little more slowly. -
・An issue where sounds from a different area are played
Depending on when you read the resistance value of the switch or how you press it, sounds from different areas may be triggered. Please try pressing areas where this issue is less likely to occur.
Plays like the standard Otamatone

-
Push Technique:
Play notes by simply pressing the stem switch.
※Unlike a touch screen you need to squeeze the stem with two fingers. -
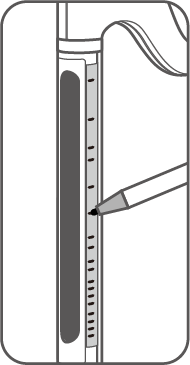
Slide technique
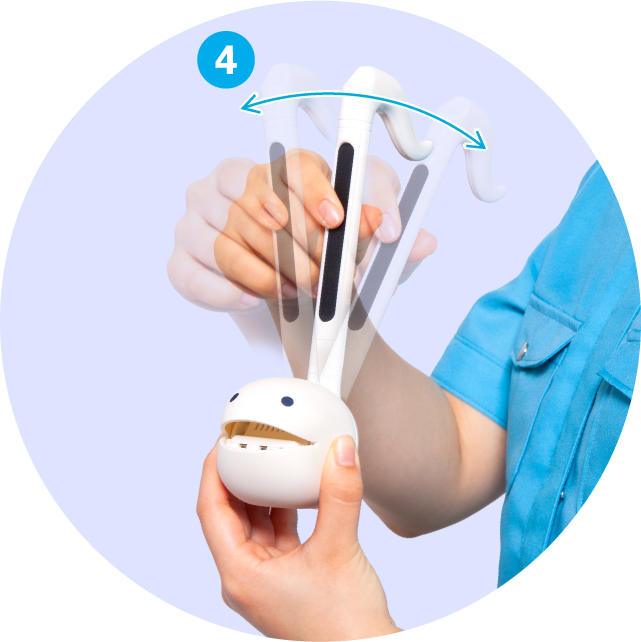
Hold down the tail switch and slide your finger up and down to play a continuous sound.
-
Wah-wah technique
If you open and close your mouth while making a sound, the sound changes to “Woof, woof, woof.”
-
Vibrato Technique:
Shake the stem while playing a note to add vibrato.
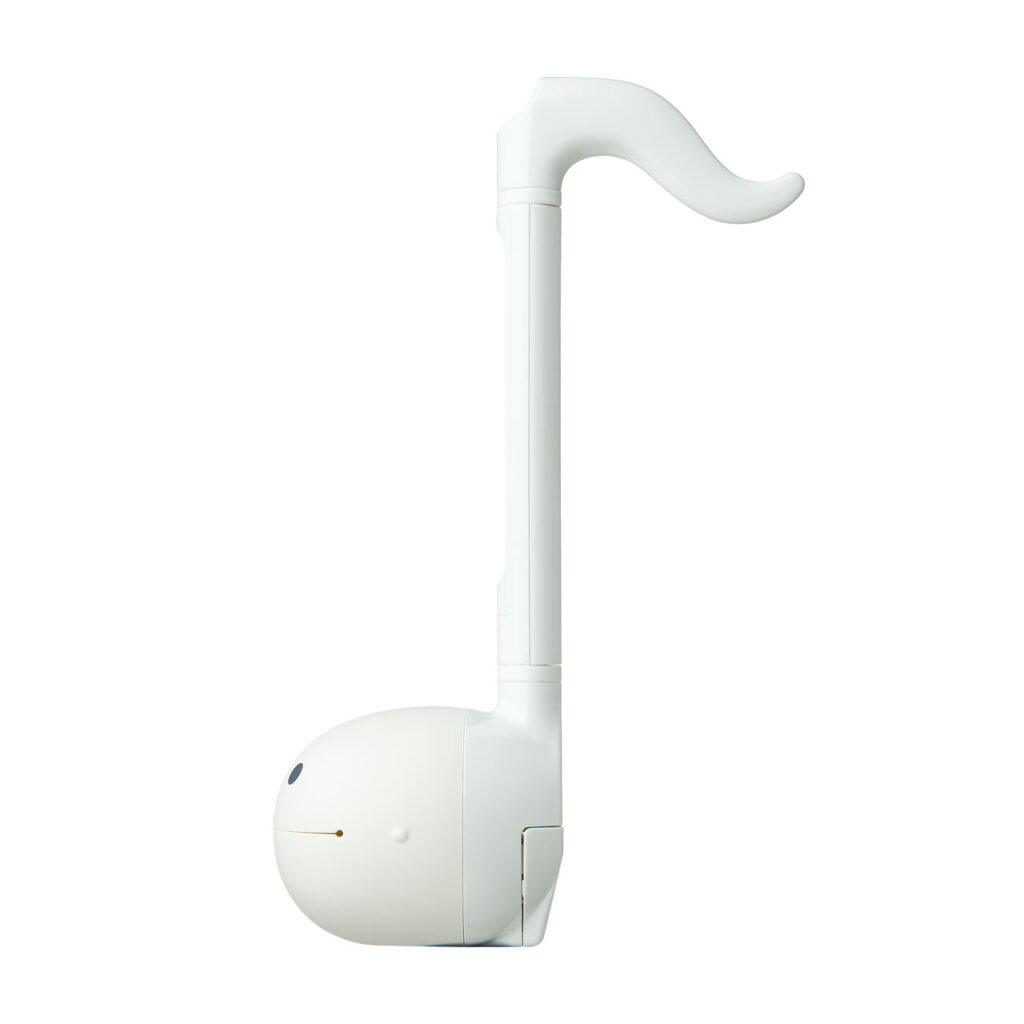
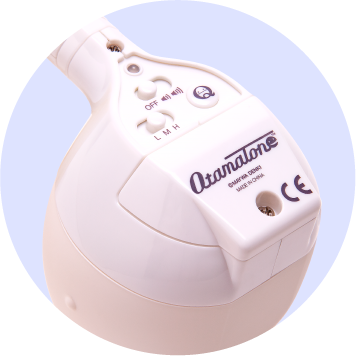
Switch Panel

-
Power LED
The color changes between Normal Mode and Percussion Mode.
Red / Blue -
Power / Volume Switch
There are two sizes: Low and Hi.
Low / Hi -
Octave Switch
3-step Octave Switch
Low / Mid / Hi -
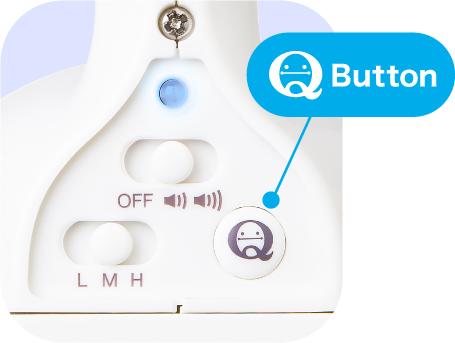
Q button
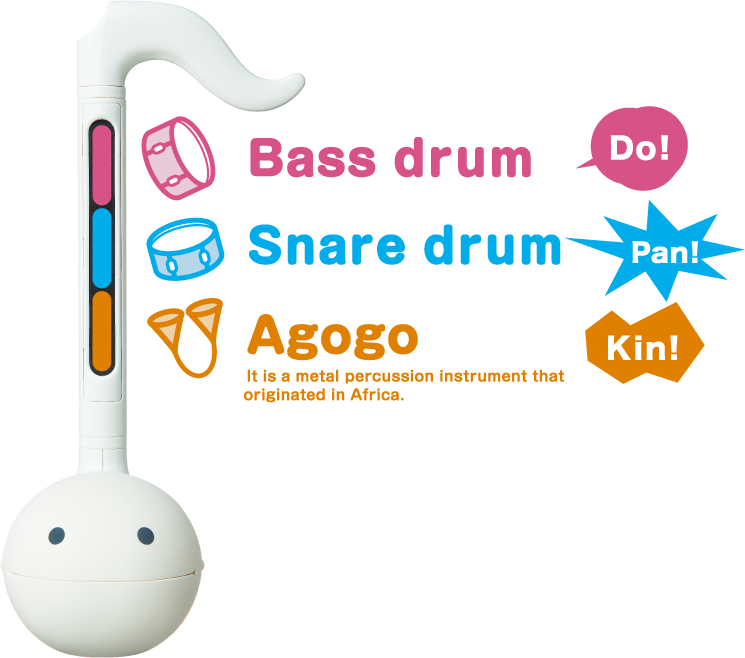
The tail switch splits into three sections to activate percussion mode.
Bass drum / Snare drum / Agogo
Practice Sheet
POINT
As you practice, you’ll gradually get a feel for where the notes are. Once you’ve gotten the hang of it, try playing using the basic grip.
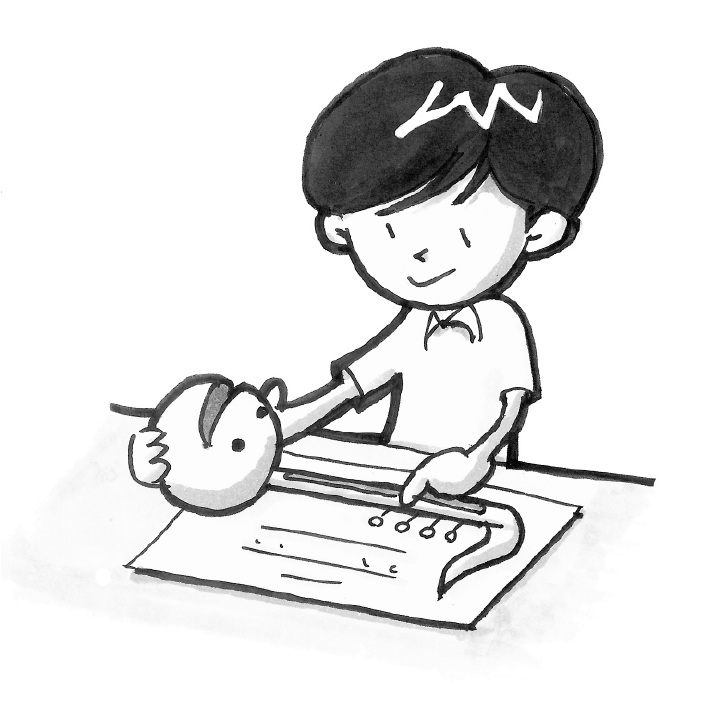
Try using the included practice sheet to get a feel for playing the song!
- ①Place it on the practice sheet so that it matches the shape of the Otamatone Q.
- ②Press the tail switch in time with the numbers while picturing the melody.
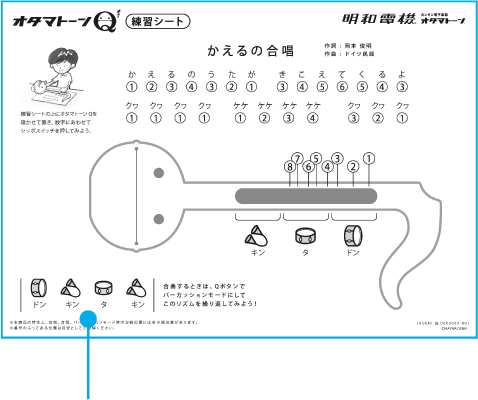
The practice sheet includes the rhythm, so you can play it as an ensemble.

Caution
- ※Due to the nature of this product, there may be slight variations in the range, pitch, and split positions in percussion mode.
- ※Please note that the numbered positions are for reference only.
We also recommend using masking tape or clear tape next to the tail switch to mark the positions of the sounds, or using stickers to label each sound’s position!
POINT
To verify the accuracy of the pitch, please try using an existing tuner.
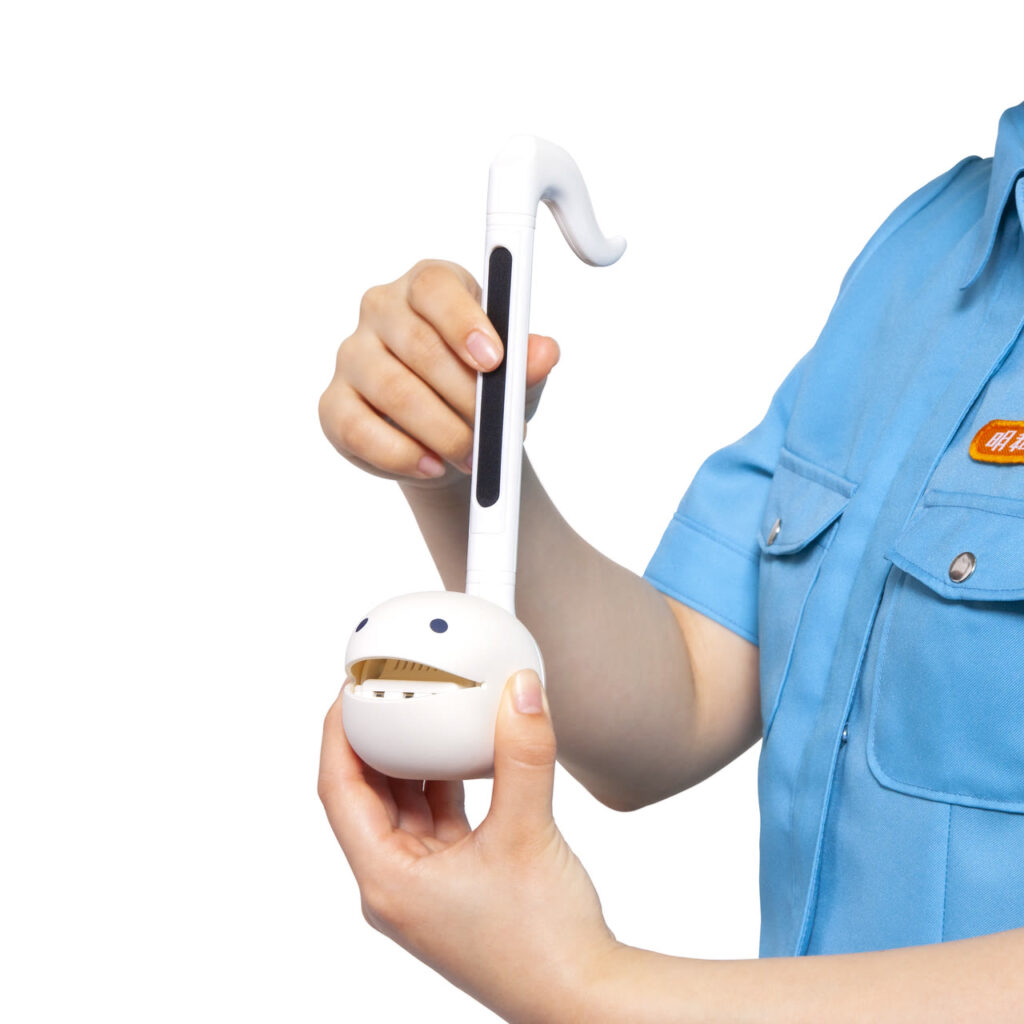
Heads of the same size are interchangeable
Silicone heads of the same size can be replaced.
Replaceable models
Introduction Movie